
Snowdon and the Fujifilm X100 vi
A recent trip up Snowdon felt like a good excuse to take the Fujifilm X100VI out again.
We decided to get to Llanberis early to catch the S1 bus up to Pen-y-Pass and start the climb via the Pyg Track, with us coming back down the Llanberis path and back to the car.
I’ve had the fuji x100vi for 6 months now so this trip felt like a good time to do a longer term review on the camera now that i’ve spent some time with it.
The Pyg Track
The Pyg Track wastes no time as it leaves Pen-y-Pas, It climbs along broken paths and after a small ridge Llyn Llydaw opens up on your left with the climb to Crib Goch on your right. A much nicer start to the climb than the Llanberis path with its steep tarmac road.

Looking back towards Pen-y-Pass from the Pyg track.
Llyn Llydaw to Glaslyn Is one of the more relaxed sections of the climb and a good place to pause for a moment to take some photo’s. The views open up behind you, with Llyn Llydaw stretching out below and the surrounding peaks framing the valley.
As we continued along this section, the weather began to shift. The cloud started to roll in across the higher ground and the fog slowly settled around the ridge ahead. The views that had been wide and open only moments before began to disappear, replaced by a softer, quieter landscape where the mountain felt a little more enclosed.

Glaslyn coming into view.
From Llyn Glaslyn the character of the Pyg Track changes. The path that had been steadily rising now turns sharply upward, beginning the steepest section of the climb towards the ridge of Snowdon.
The route zigzags up the rocky slope, gaining height quickly. The steps are shorter, the path rougher underfoot, and progress slows as the mountain reminds you that the summit still needs to be earned.
By this stage the cloud had fully settled across the mountain. The ridge above us would appear briefly through the fog before disappearing again, making it difficult to judge how far remained. It’s a short section compared to the rest of the route, but it’s easily the most demanding part of the climb. Step by step, the path eventually pulls you up onto the ridge where the character of the walk changes once again.
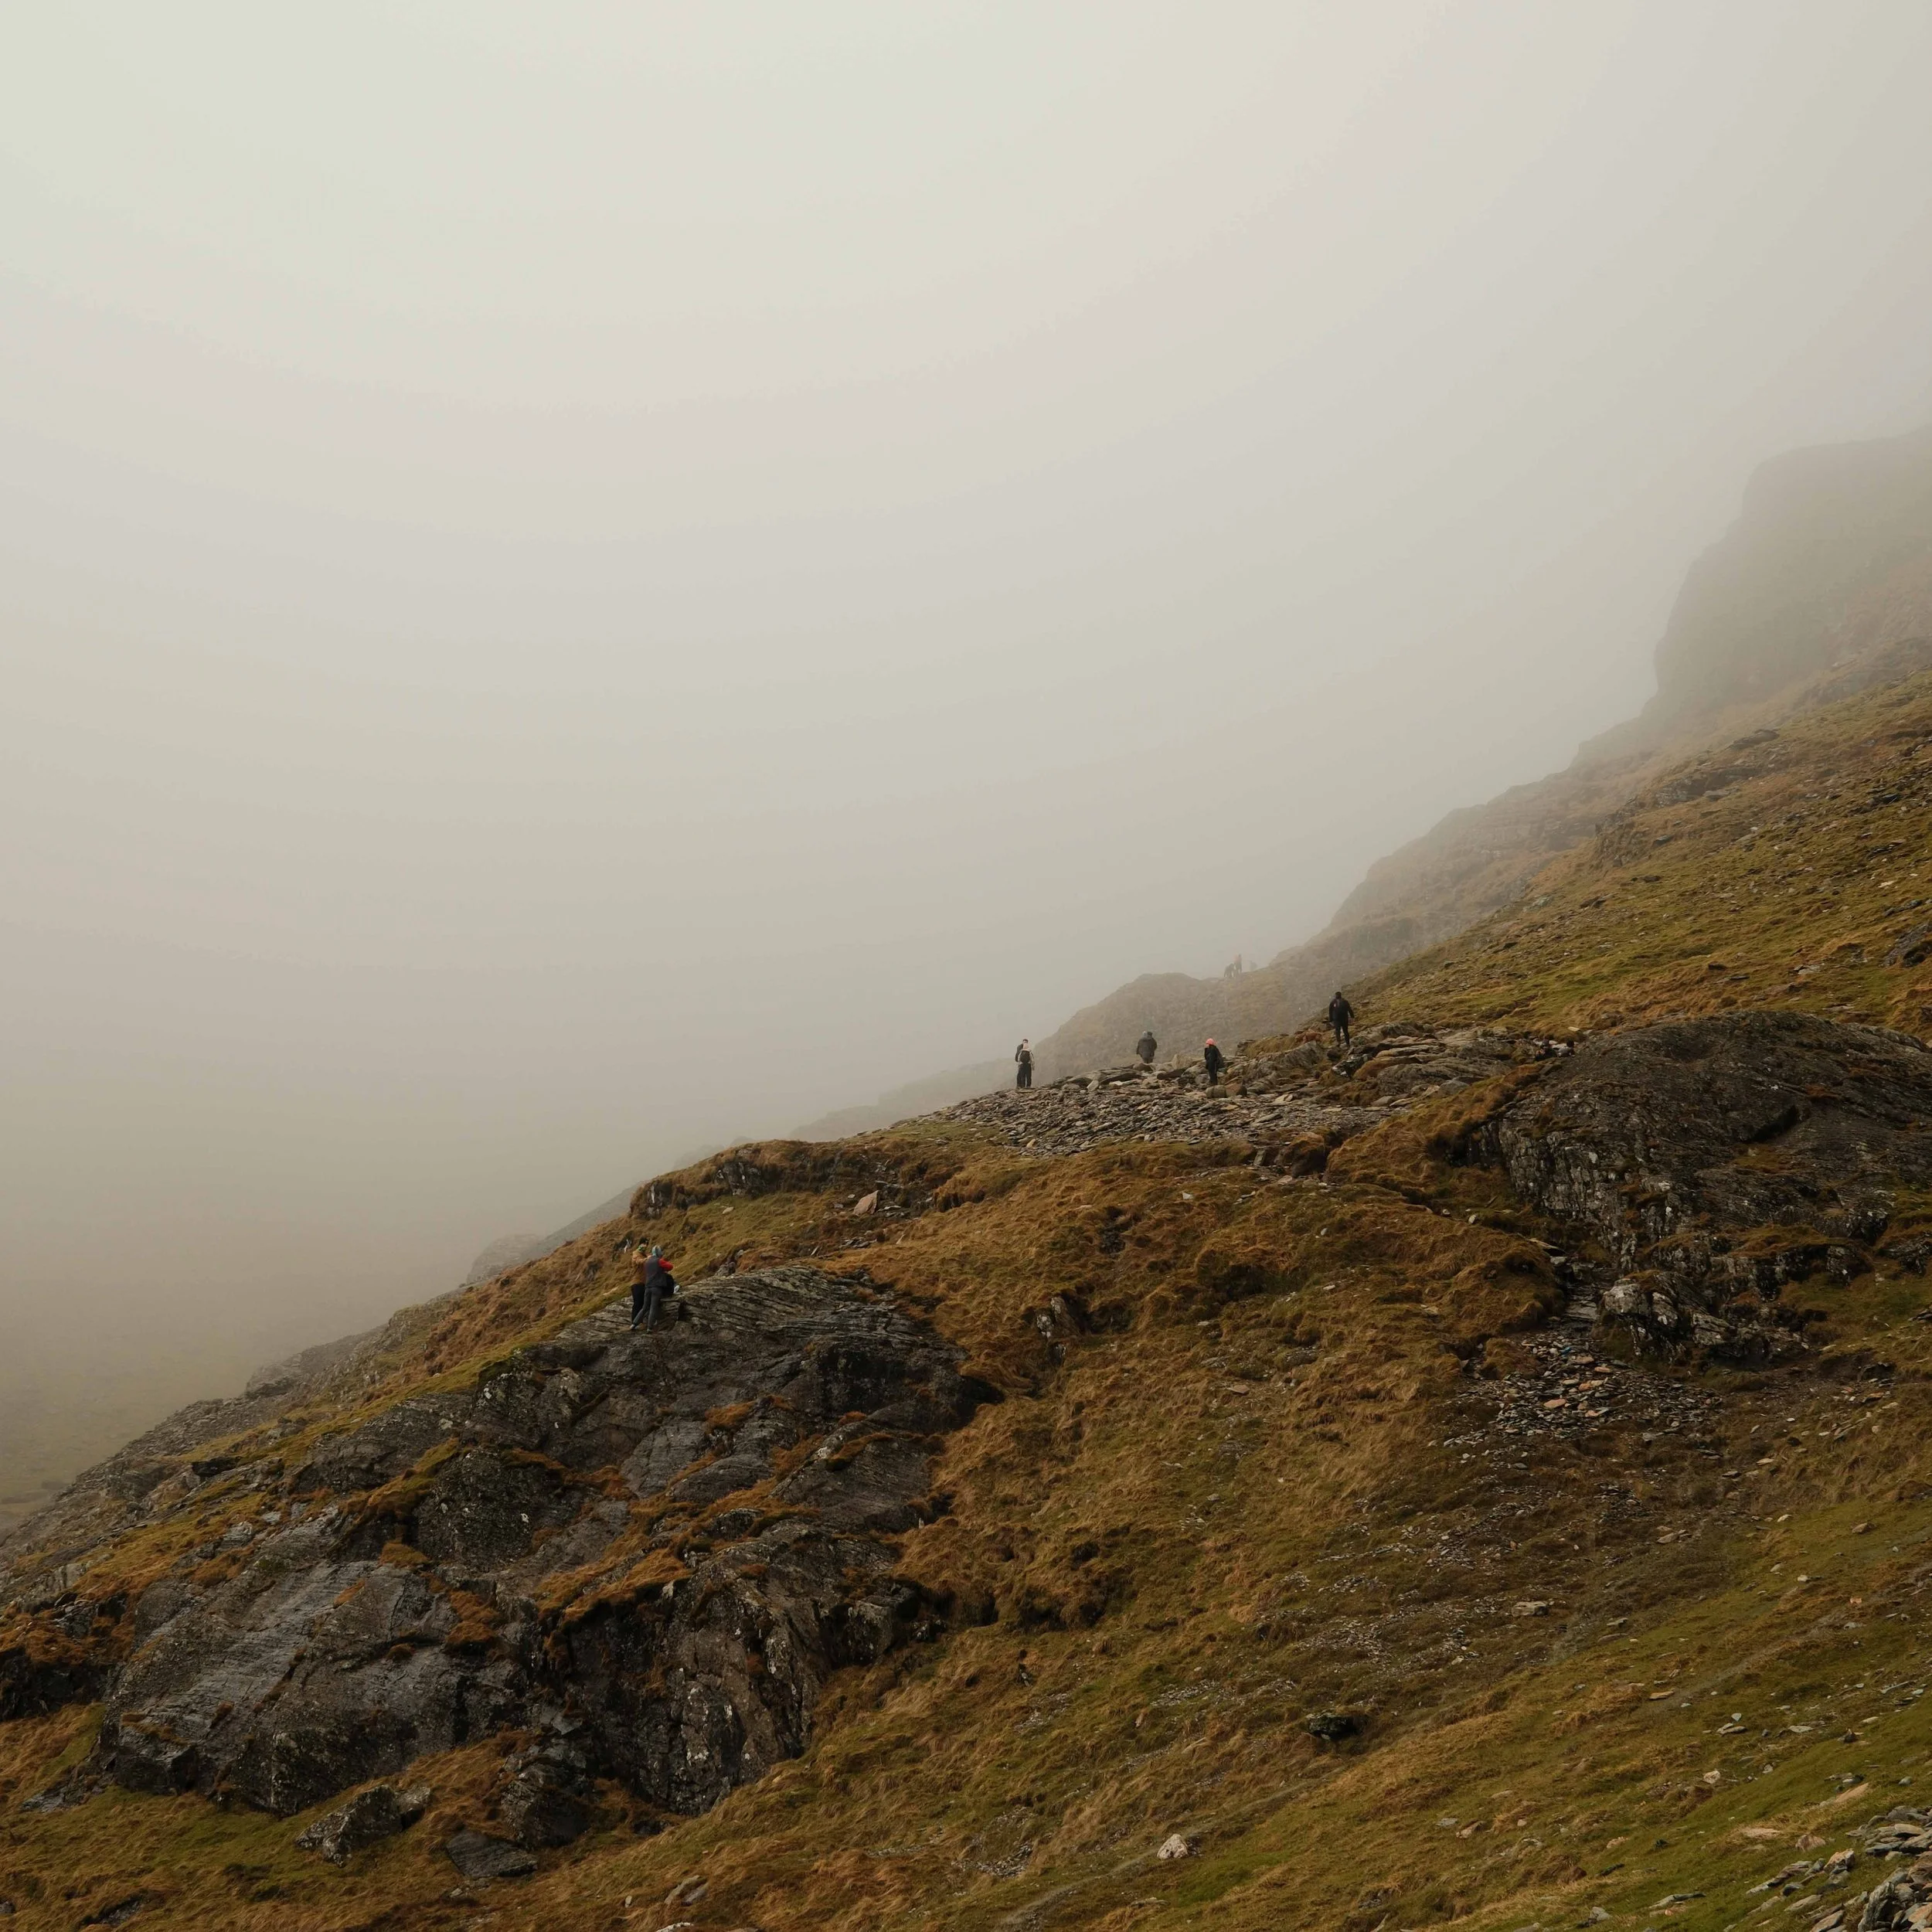
Into the clouds and up to the summit.
The Summit
Reaching the ridge at the top of the Pyg Track feels like the final turning point of the climb. From here the path joins the broad ridge that leads the last short distance to the summit of Snowdon.
Compared to the steep ascent above Llyn Glaslyn, this section is straightforward. The path levels out and the summit is only a short walk away, usually visible ahead along the ridge.
As we reached the top, however, the weather shifted dramatically. It had already been fairly cool throughout the climb at around 4°C, but stepping onto the ridge we were suddenly hit by a strong, biting wind. The temperature quickly dropped to around –2°C and the exposed ridge felt noticeably harsher than anything we had experienced lower down.
The ground was coated in patches of ice, what is normally a simple final walk to the summit required a bit more care underfoot. The fog that had followed us up the mountain still hung around the ridge, giving the landscape a cold, muted feel as we made the final approach.
Despite the change in conditions, the summit was only a few minutes away. The path gently climbed the last stretch before finally bringing us to the top, as we hit the top and waited in a short queue to hit the summit the cloud started to clear showing us what waited below on the Llanberis path.
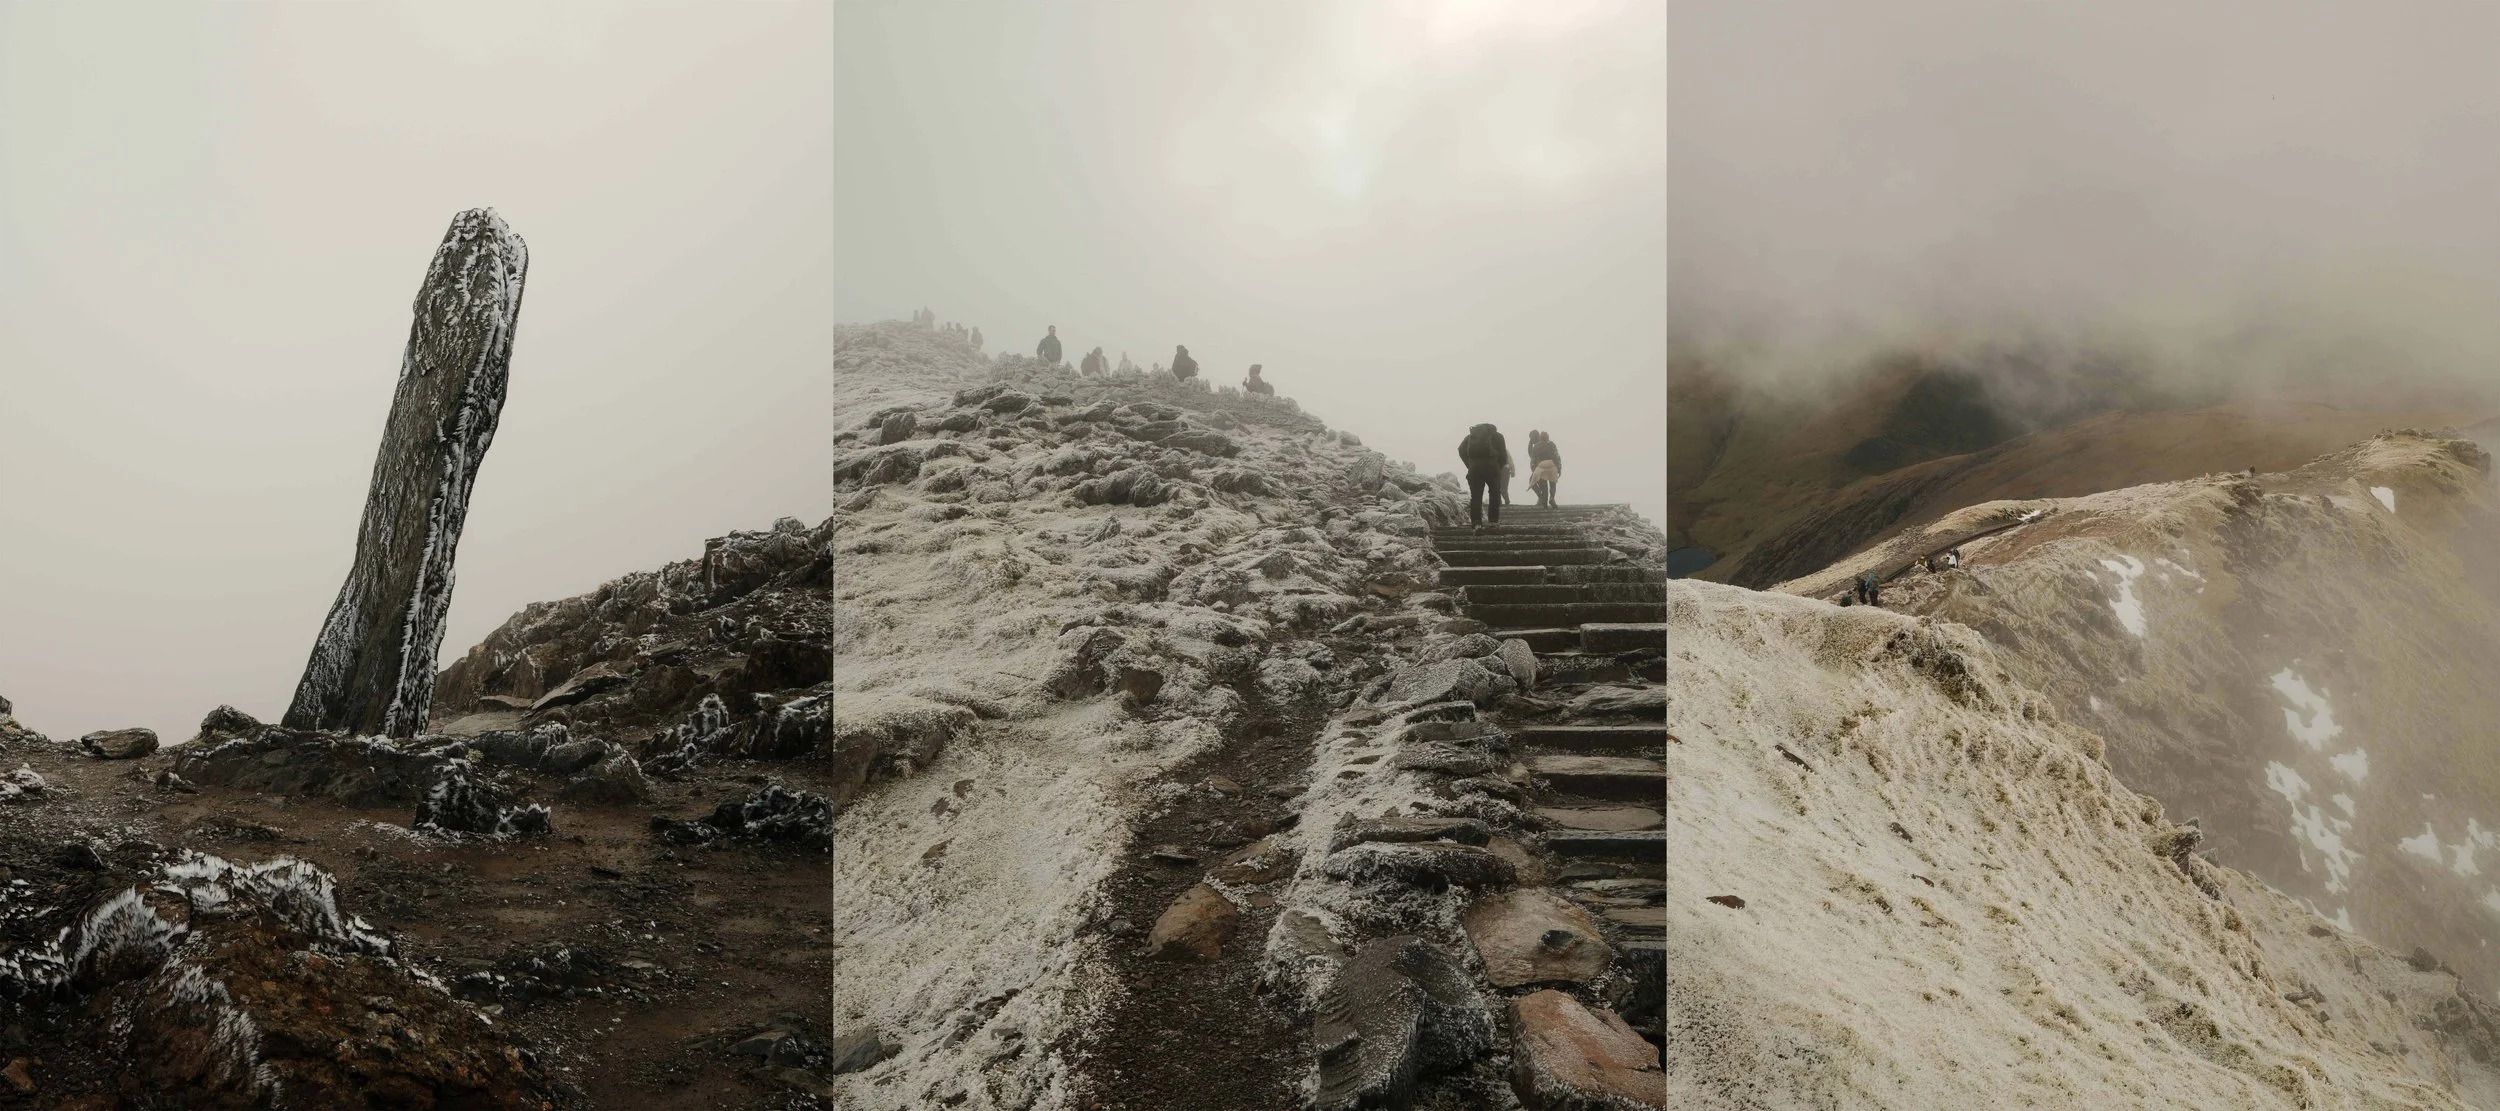
top of the Ridge line, heading to the summit and looking back down towards Llanberis.
Down the Llanberis Path
After a short stop, we began the walk back down via the Llanberis Path.
Compared to the rugged ascent on the Pyg Track, the Llanberis Path is nice and easy. The wide, steady trail winds its way down the mountain at a consistent gradient, making the descent straightforward.
The cold wind and icy patches near the summit stayed with us for the first part of the descent, and we took things slowly while the ground was still frozen underfoot. As we lost height, though, the conditions began to ease. The wind stopped and the temperature lifted slightly.
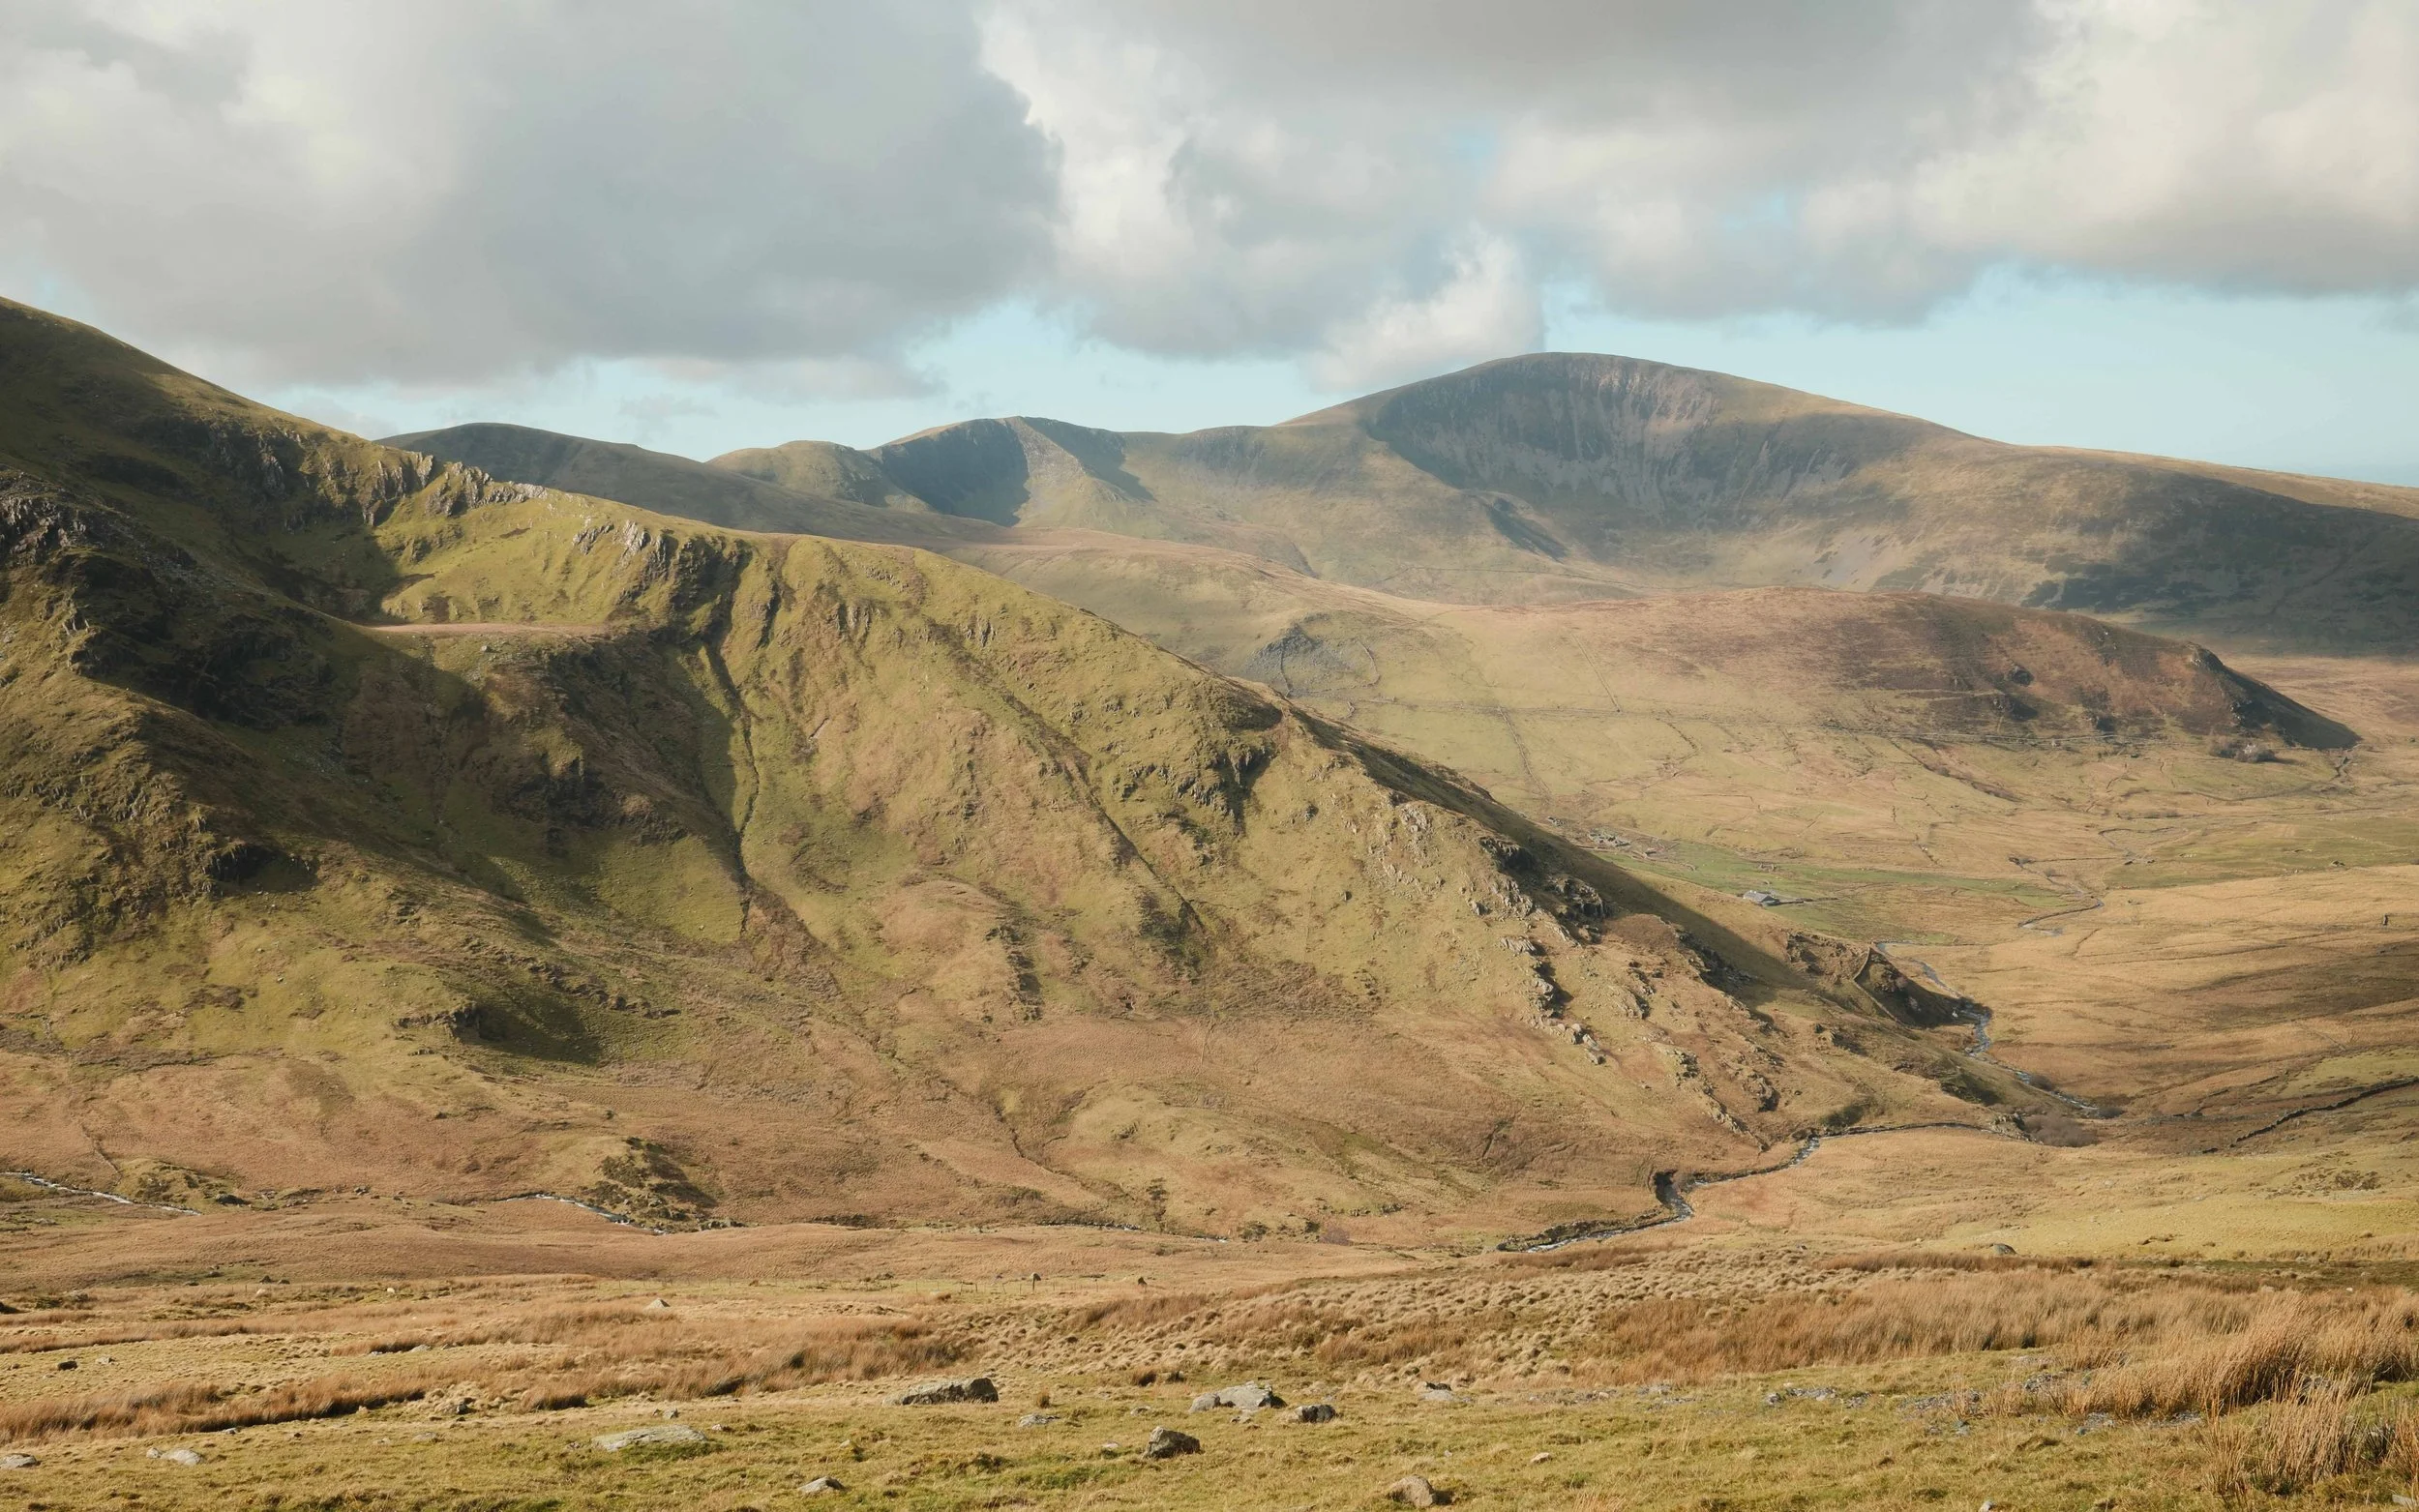
What the Llanberis Path lacks in drama compared to the other routes, it makes up for in perspective. The mountains open up around you as the descent continues, with the summit gradually disappearing behind your shoulder while you drop into the valley.
After the steep climbing earlier in the day, its a nice way to finish the walk. The path eventually led us all the way back down towards Llanberis, bringing the day on the mountain to a close.
Long-Term Thoughts on the X100VI
So after spending 6 months and taking 4,500 photo’s, I thought it was time to do a longer term review. It’s not a camera I tend to analyse too much while using it, It’s easy to pick up, easy to carry, and easy to live with.
Film Simulations and Image Workflow
For the most part I’ve stuck with a single look: a customised version of Kodak Gold. I’ve removed the grain from the simulation and left the sharpness and clarity, leaving something that still carries the colour of the film profile but produces a cleaner digital file.
Film Sim: Classic Chrome
Grain Effect: Off
Colour Chrome Effect: Weak
Colour Chrome Effect Blue: Off
White Balance: Daylight, Red +4, Blue, -5
Highlight: -1.5
Shadow: +0.5
Colour: +3
Sharpness: 0
Noise Reduction: -4
clarity: 0
I shoot both RAW and JPEG, but in reality about 90% of the images I use come straight from the JPEGs. The film simulation gives me a consistent look across a series of images, and most of the time the files coming straight out of the camera are exactly what I want.
The RAW files are really just there as a safety net. Occasionally I’ll dip into them if I want to recover a bit more dynamic range or push the image further in editing, but that’s the exception rather than the rule.
Custom Buttons and Controls
One of the things I’ve grown to appreciate with the X100VI is how easy it is to tailor the controls to the way you shoot.
I’ve set the Fn button to quickly toggle face detection on and off. It’s a small thing, but it works incredibly well in practice. When shooting people it’s useful to have face detection available instantly, and when I’m photographing landscapes or scenes where it might interfere, it’s just as quick to disable.
The AEL/AFL button is set to control photometry, which is a setting I use quite extensively. Being able to change metering quickly without digging into menus keeps the camera feeling responsive and intuitive.
Autofocus and Shooting Style
In terms of autofocus, I’ve kept things fairly simple. I use a single focus point and tend to focus and reframe. It’s a method that’s worked for me for years and it still feels natural with the X100VI.
While the autofocus system is capable of much more complex tracking modes, I’ve found that keeping things straightforward suits the way I shoot with this camera.
How It Fits Into My Kit
The X100VI has become my everyday camera. It’s the one that’s easy to take with you without overthinking it. Whether it’s a day out, a walk, or just having a camera on hand, it’s small and unobtrusive enough that it never feels like a burden.
Quite often I’ll pair it with another camera rather than rely on it exclusively. I’ll usually take the Fuji alongside my Leica M6, or occasionally alongside my drone, the DJI Mini 5 Pro. In those situations the X100VI acts as the quick, versatile camera that fills the gaps between more deliberate shooting.
My Nikon Z f has gradually shifted into a different role entirely. That’s now the camera I reach for when I’m heading out specifically to shoot landscapes and want more control over focal length and lens choice. The X100VI, on the other hand, is about simplicity.
Accessories
One of the things I like about the camera is that it doesn’t really need much added to it. I tend to keep it exactly as it is and only occasionally use a circular polariser when conditions call for it.
Beyond that, it’s a camera I prefer to leave uncluttered.
Image Quality
The images coming out of the X100VI are excellent. The combination of the sensor, lens, and Fuji’s colour profiles produces files that are detailed but still have a natural feel to them. For the kind of photography I use this camera for, travel, walks, everyday moments.
The One Real Drawback
If there’s one area where the camera does fall short for me, it’s battery life.
For shorter outings it’s perfectly manageable, but on a full day of shooting it can feel a little restrictive. Carrying spare batteries quickly becomes necessary, especially if you’re shooting regularly throughout the day.
It’s not a deal-breaker by any means, but it’s probably the one limitation that consistently reminds you that this is still a small camera.
Final thoughts
Walking up Snowdon via the Pyg Track and returning down the Llanberis Path makes for a really rewarding morning in the mountains. The Pyg Track offers a more dramatic and varied climb, while the Llanberis Path provides a steady and relaxed way back down. Even with the cloud rolling in and the temperatures dropping along the ridge, it was one of those days that reminds you why these walks are worth the effort.
It also reinforced why the Fujifilm X100VI has become such a regular part of my kit. It’s a camera that’s easy to bring along without feeling like you’re carrying a lot of equipment, yet it’s capable of producing images that hold up just as well as those from much larger systems.
For a day out like this, walking, changing weather, and moments where you want to stop quickly and take a photograph, the X100VI fits perfectly. It’s small enough to always have with you, simple enough to use without thinking too much about settings, and the JPEG files coming straight out of the camera are often more than enough.